Searching for a WordPress Amazon S3 tutorial?
WordPress websites are one of the most popular platforms on the web today with over 60 million active installs worldwide.
But what if you want more control over your hosting?
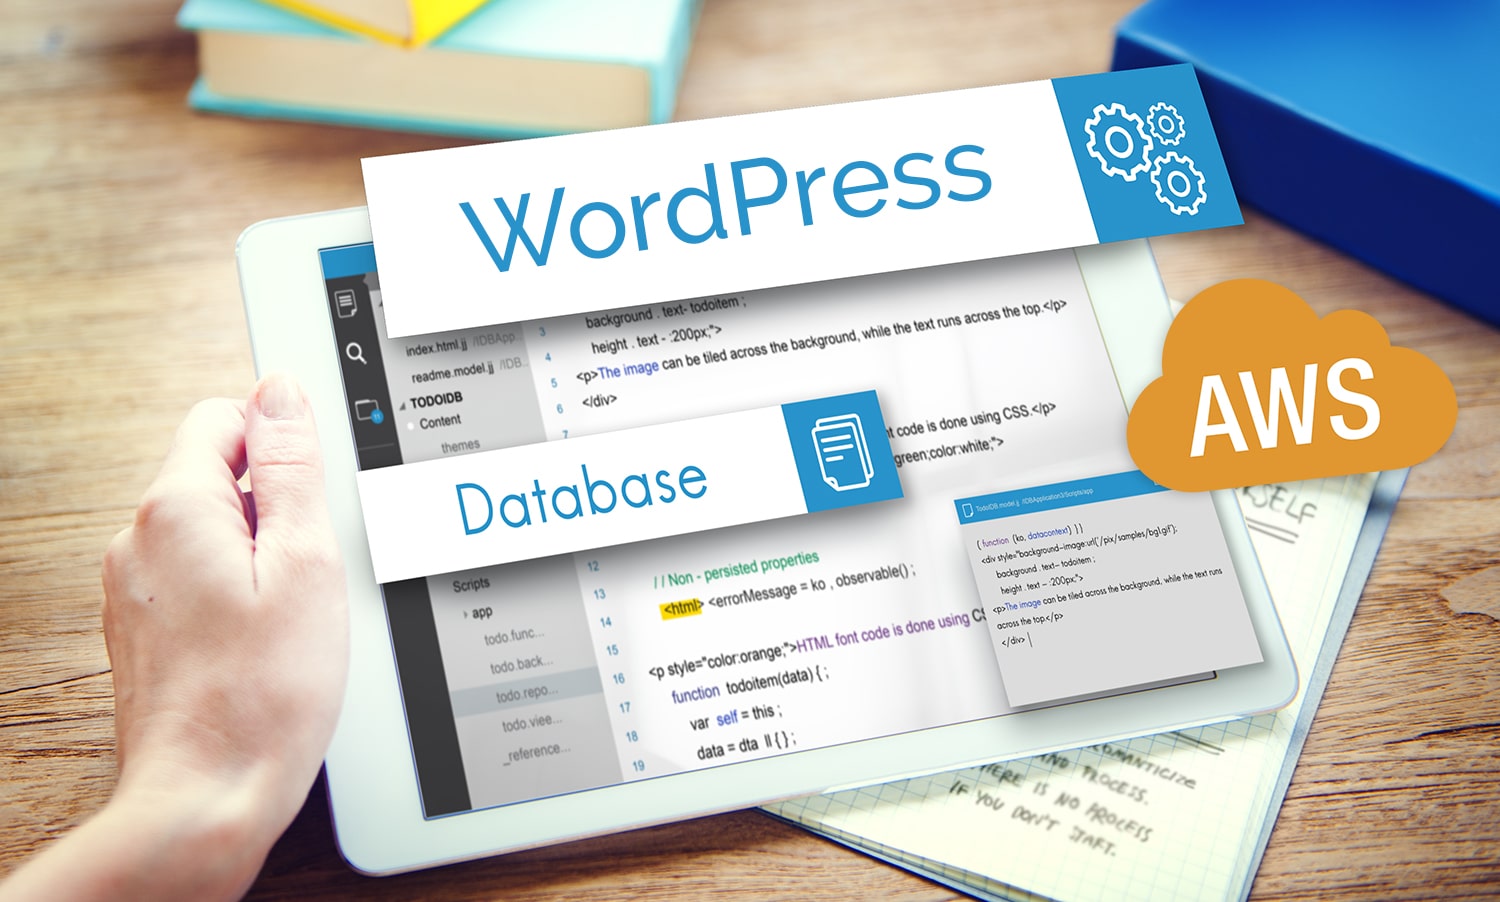
You can set up a WordPress site on Amazon S3 so that all of your website files reside in Amazon’s cloud storage instead of relying on third party servers. This guide will show you how to connect WordPress to Amazon S3 bucket so that every time someone visits your site, they load data stored remotely rather than pulling it down from another server near them.
The Plugin used here is WP Offload Media Lite (204KB).
Let’s get started!
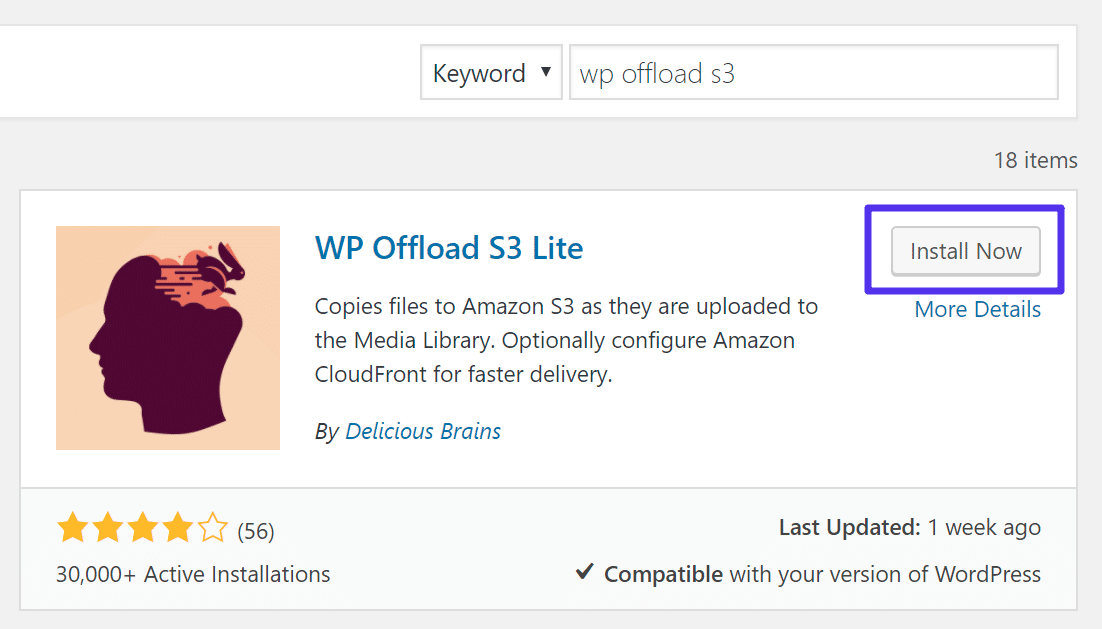
#1. Installation of WP Offload S3 Lite plugin
Visit → WordPress repository → search WP offload S3 → Add New → “Install Now” and activate.
Once you activate WP Offload media lite, next you need to Define your AWS keys.
#2. Log in to your Amazon Web Services account
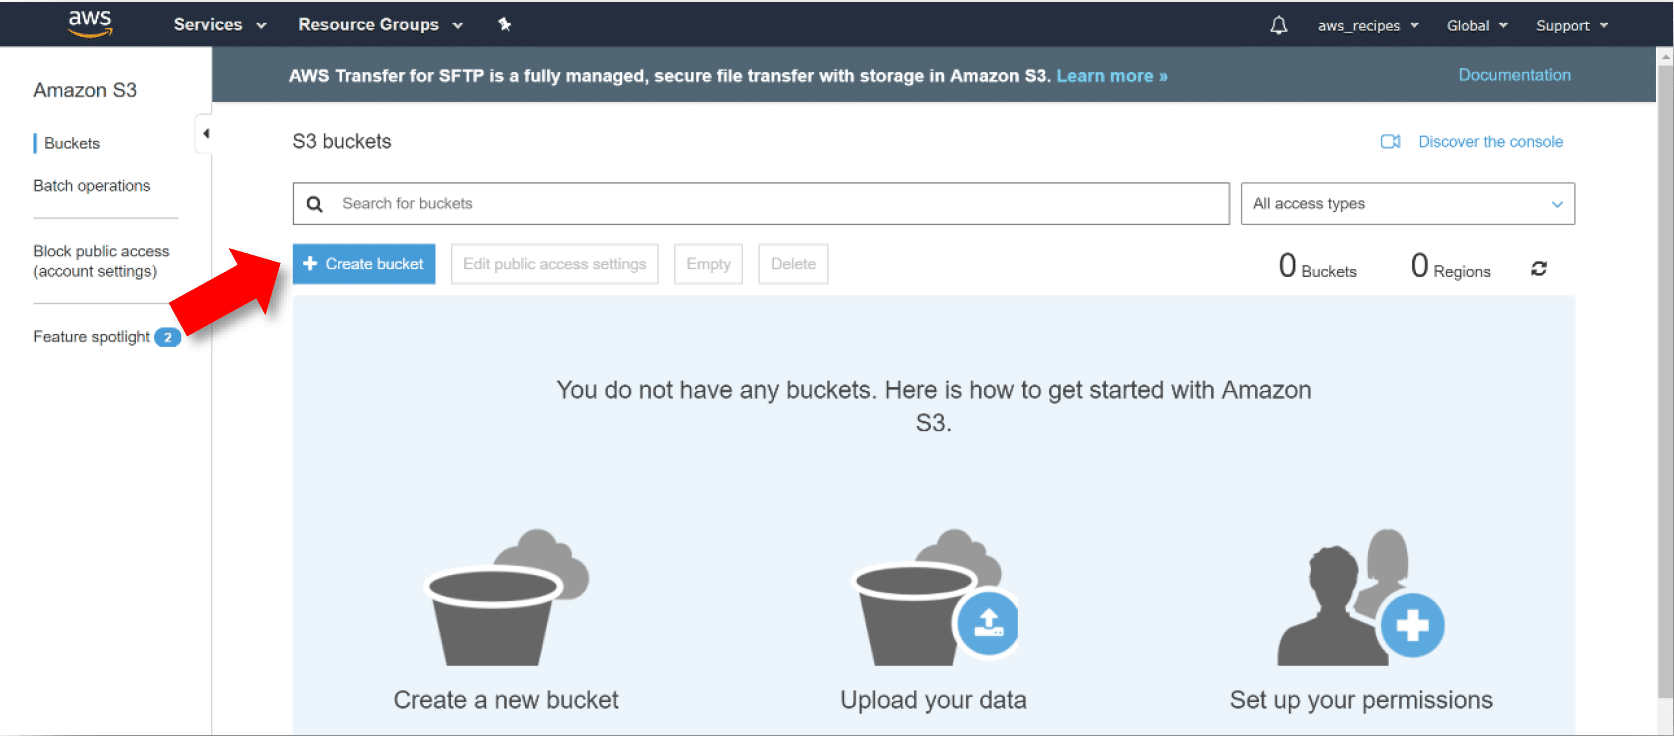
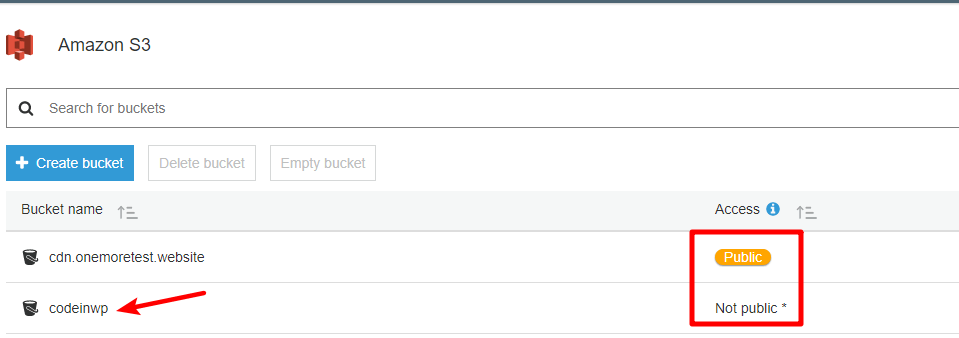
To get started, you need to create a bucket in Amazon Web Services (AWS) that will hold your site files.
- Visit the Amazon S3 Console and click “Create Bucket” button in the top right corner.
- If this is your first-time using Amazon AWS then you will have to provide your credit card information and mobile phone number (for verification purposes) before you can get started.
Note:
Bucket is Amazon S3 storage area basically a collection of files where you store your file instead of storing it in your server.

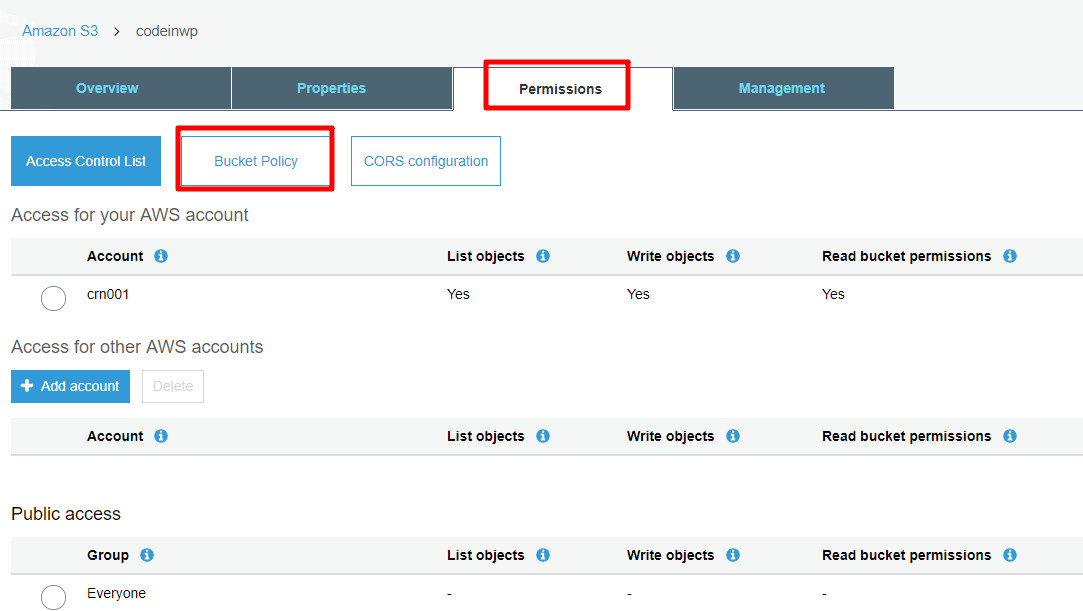
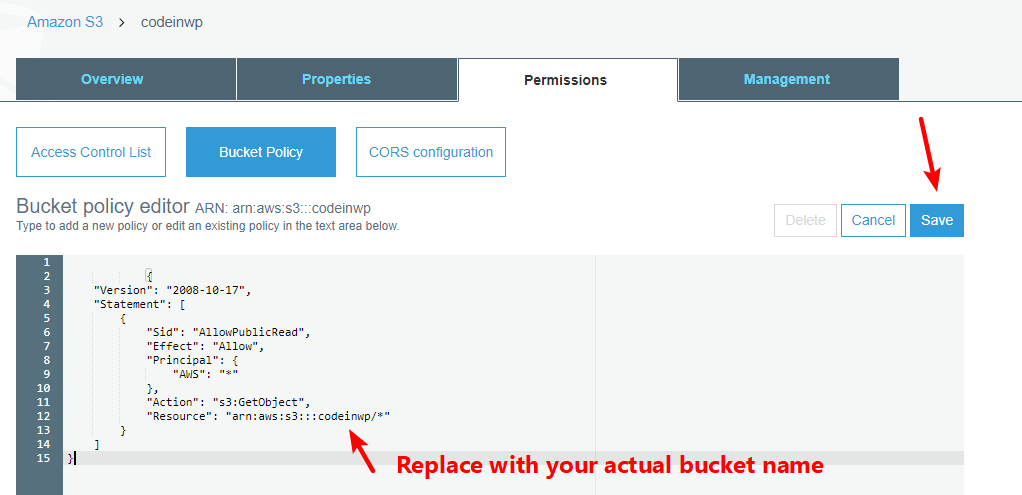
#3. Set up Bucket Policy
A good bucket policy will make your S3 buckets public, so you can access them from anywhere. To do that though there’s something called a Bucket Policy.
To add bucket policy click on your bucket. Here bucket name is codeinwp, you can rename it.
Select Permission tab → Bucket policy → Replace codeinwp with the actual name of your bucket.
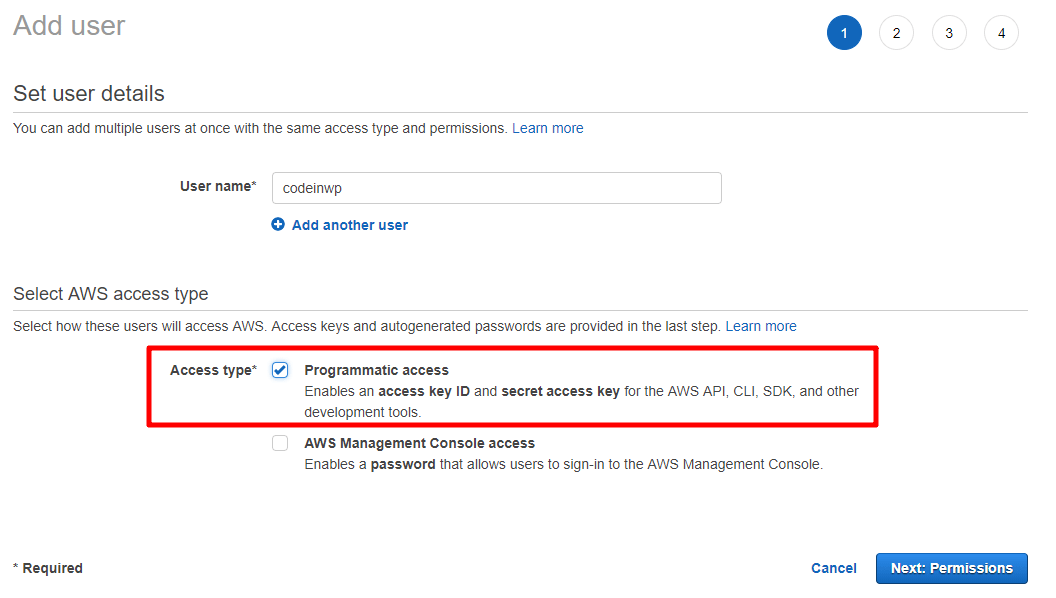
#5. Create an IAM user and policy
- Create a specific set of permissions for each platform in order to access only what’s needed from them while still maintaining control over who has access as well.
- To create your IAM user, go to the AWS Access Management area of your account.
- Click on User and then Add user.

- Give your username and make sure they have programmatic access enabled. Then select Next Permissions
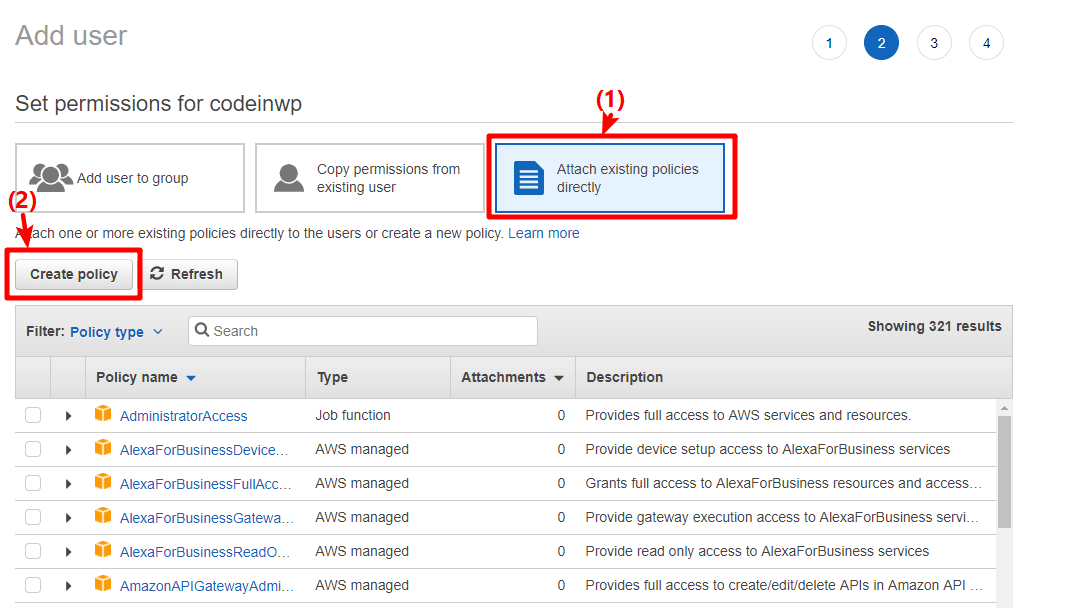
Next,
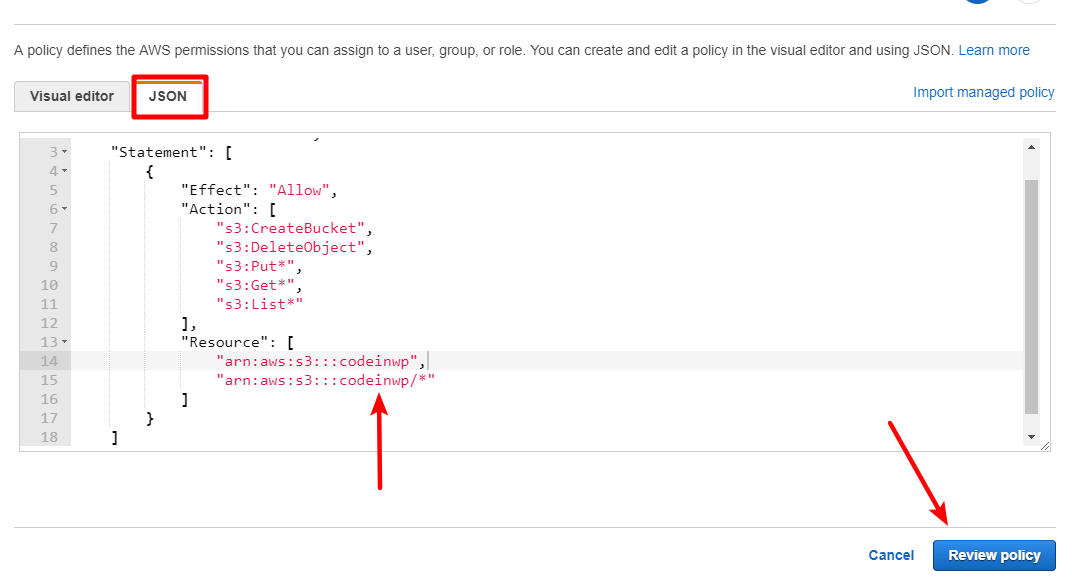
Click on Attach existing policies directly tab and then click on Create Policy.
Just after this a new window will launch, you need to go to the JSON tab and paste in this code snippet:
Note:
Don’t forget to replace codeinwp with the actual name of your Amazon S3 bucket → click on Review Policy
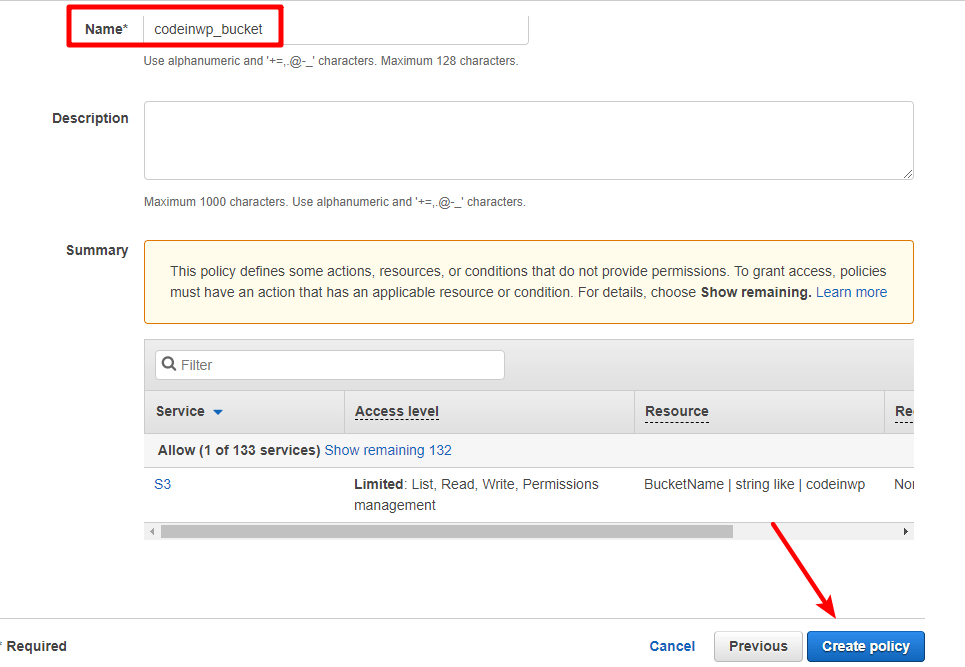
Next screen,
Name it and then click Create policy
Now:
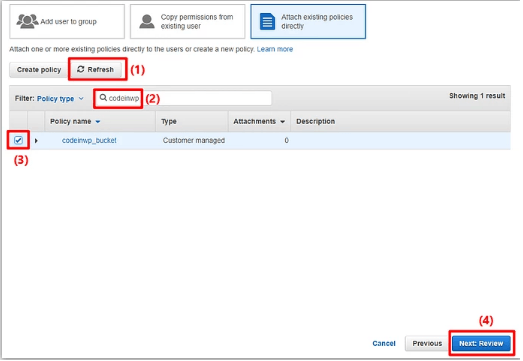
- Go back to the IAM Add User tab and Click Refresh
- Search and Select the policy that you just created
Click Next: Review
- Create user

Wait is over,
Get Access Key ID and Secret Access Key.
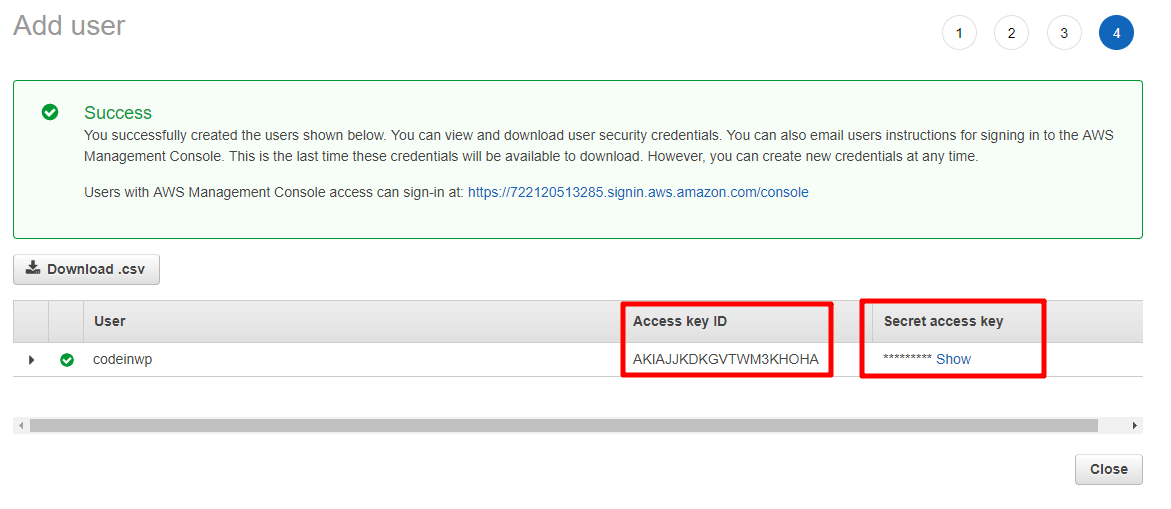
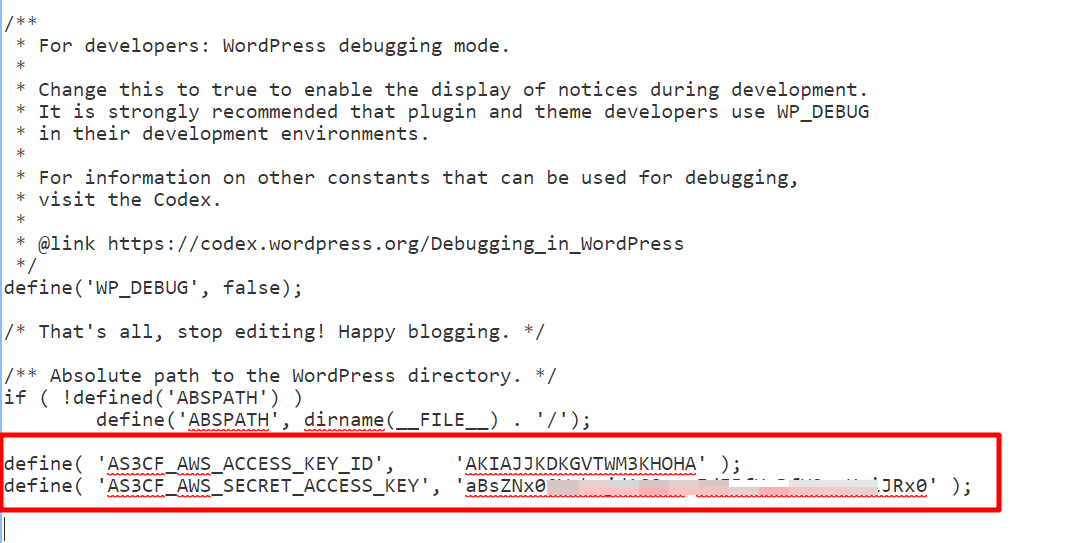
#7. Get access key ID and secret key access and Add access keys to wp-config.php file
- Edit your wp-config.php file by FTP or via cPanel file manager.
Add the code below to your wp-config.php file, also replace ****** with your actual keys and then Save Changes.
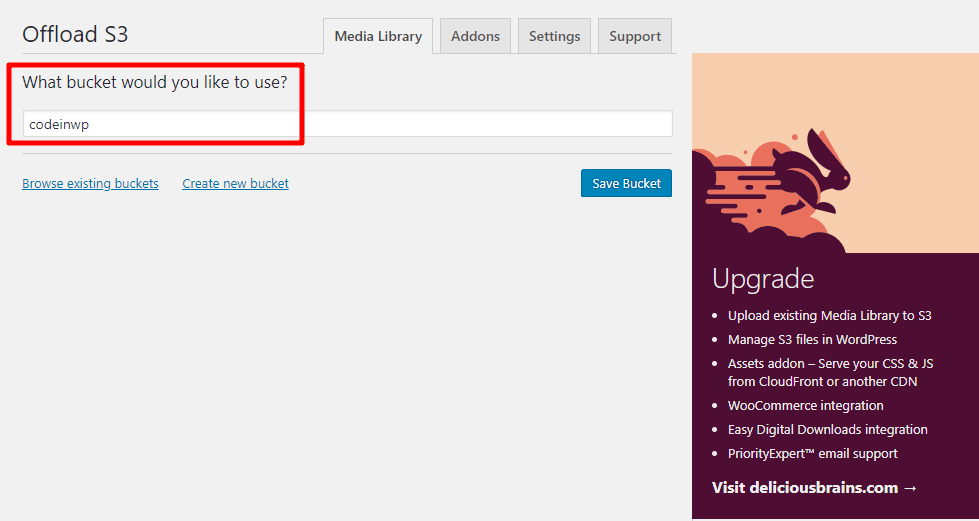
#8. Go to WP Offload Media Lite Settings Menu and select S3 Bucket
Settings → Offload S3
#9. Offload S3 settings Configuration
The “Offload S3 settings” section in the AWS Management Console allows you to configure how much load is placed on your own web server.
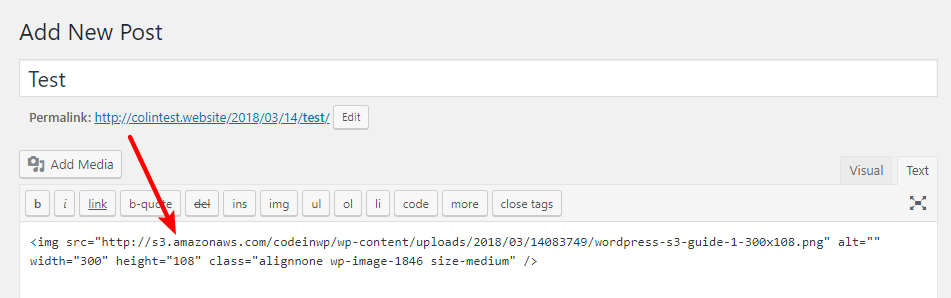
There are many WordPress plugin available and by availing a WordPress S3 plugin, you can make your work simple and easy. You can offload files and take the benefit of Amazon Web Services’ infrastructure. For more info, visit wpdisplayfiles.com.
