
WordPress Media are the files that are uploaded to your site by users. The most common file types are images, video, audio, and documents. When you upload media to WordPress, it stores it in a directory called wp-content or uploads. If you are new to WordPress or just upgrading your blog to the latest version of WordPress, having access to all of the media files that come with it can be a real pain. Luckily there is an easy solution. All you need is Dropbox and one plugin like the Display Files Pro plugin. Follow these steps below for complete instructions on how to serve up all those media from Dropbox.
Step 1: Install and activate Dropbox Plugin External Media for WordPress. You can do this by going to Plugins ->Add New and search for the Dropbox Plugin. Then click “Install Now.”
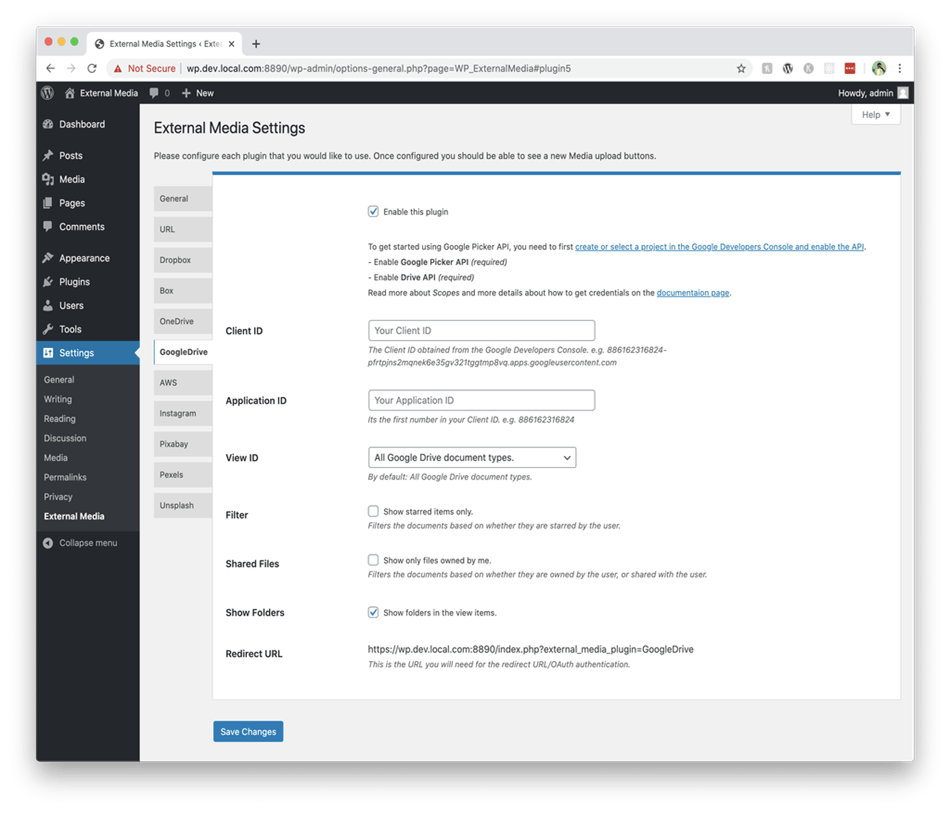
Once installed, go to Settings ->Dropbox on your dashboard menu and add in your API key from your Dropbox account.
Step 2: When your Dropbox Plugin is successfully connected to a valid Dropbox account, you will be able to click the “Save Changes” button and activate it on all of your blogs.
When activated, you can check out the dropbox plugin settings by going back to Plugins -> Installed Plugins on the dashboard menu.
You will then go to Settings -> Dropbox. And you can choose which directories are being served up by your Dropbox Plugin.
Step 3: It is possible that depending on how much media is in your wp-content, it may take some time to upload it all to your Dropbox account. To do this, click on the option and authorize the plugin to access your Dropbox account.
Once completed, you will be redirected back to the WordPress Dashboard, where you can click “Click here to continue” at the bottom of the page. This step will be repeated every couple of minutes, depending on how much is in your wp-content/uploads.
Offsetting this, however, is the fact that if you delete files from your WordPress Media Library, they will automatically be removed from Dropbox.
To get around this, you can have one main directory in your Dropbox account: your WordPress installation’s wp-content/uploads directory. This way, if you ever delete anything from your wp-content/uploads, it will not remove the files in Dropbox as well, and you can use the “copy to Dropbox” function on your WordPress Dashboard to upload any media that exists outside of your wp-content/uploads.

Step 4: Once you have covered all of your bases and all of your media is successfully being served up by Dropbox, go back to Settings -> Dropbox and disable the Dropbox Plugin by clicking “Deactivate.” You can also delete any directories that you have created if you wish as well.
Now all of your media will be served up from Dropbox, and since it is a free account, there is no limit to the amount of data you can use. Display Files Pro plugin can display files and folders saved within root folders stored on popular cloud storage platforms. You can check out some amazing features of the Display Files Pro Plugin at wpdisplayfiles.com. For more info, visit us today.
